
Tax Toggle for WooCommerce
The most customizable and user-friendly Tax Toggle for WooCommerce. This plugin allows your shop visitors to view prices with or without tax. UI elements are fully customizable, and the toggle button can be placed anywhere on the page using shortcodes, widgets, or PHP.
Toggle Tax
Change between viewing the price with and without VAT.
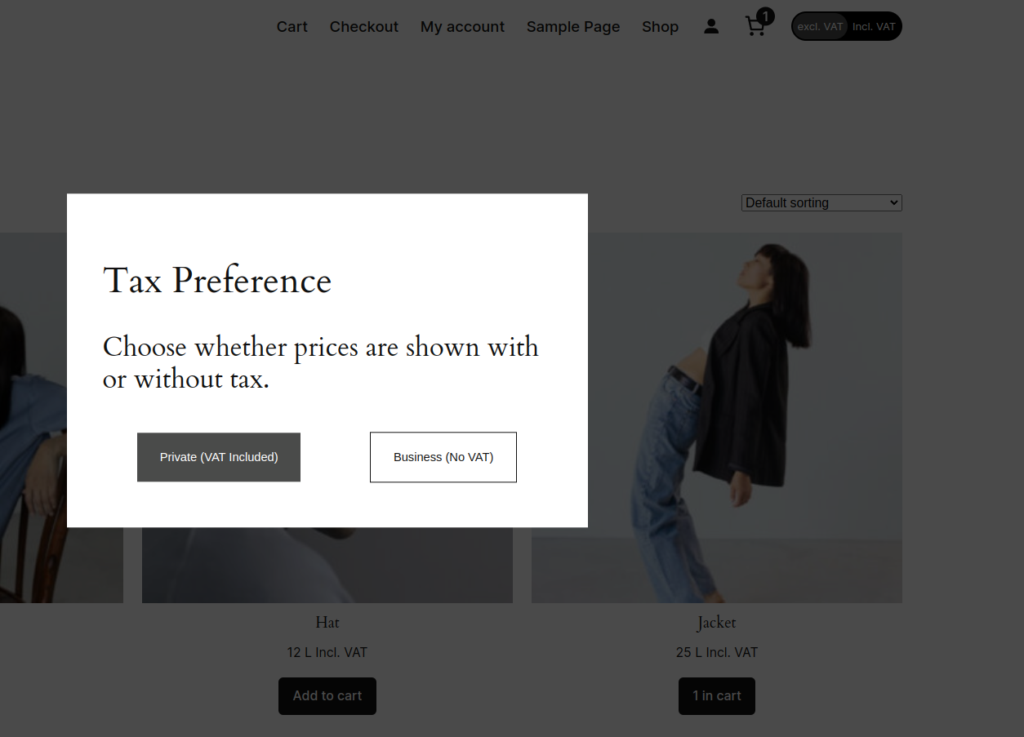
Popup on first visit
A popup allow users to select their preference on first visit.
Fully Customizeable
The toggle is fully customizeable
Ready to enhance your store?
Join all of the other stores using Clypper’s Tax Toggle for WooCommerce today!
Other features
- Completely Customizable: All text and colors can be customized by shop owners, regardless of how you choose to display the toggle.
- First-Visit Popup: Display a customized popup to visitors, allowing users to choose their tax preference before entering the shop.
- Dynamic Price Updates: Dynamically switches tax for product prices without refreshing the page.
- AJAX Compatibility: Works seamlessly alongside AJAX-based product search and filter plugins.
- Page Builder Integration: Dynamic widget that integrates with popular page builders including:
- Oxygen
- Bricks
- Elementor
- Flexible Placement: You can display the toggle through:
- Blocks
- Shortcodes
- Widgets
- PHP code
- Performance Optimized: Developed with minimal JavaScript and CSS, ensuring minimal impact on site performance.
User Experience
Setting a tax preference is as simple as clicking a toggle button, which site owners can place anywhere on the page. A user’s chosen tax preference is saved, and navigating to new pages does not reset the preference.
The plugin also offers a popup option that allows users to choose their preferred tax option when first visiting your site.
Compatibility
Important Note: This plugin is not compatible with plugins that alter WooCommerce’s default price display functionality.
Tested and fully compatible with:
- WordPress 6.+
- WooCommerce 9.+
- PHP 8.0+
Usage
The tax toggle can be placed anywhere in your store using one of these methods:
Dynamic Widget
Enables placement of multiple tax toggles on your page, with individual styling options for each toggle.
Shortcode
Use the shortcode to insert the tax toggle. Text and style can be modified from the plugin settings.
PHP Implementation
Use PHP by either:
tax_toggle_tax_shortcode()or
echo do_shortcode('[tax-toggle]');Text and style can be modified from the plugin settings.
Configuration Guide
Widget Settings
| Setting | Description |
|---|---|
| Excl. VAT button text | Text displayed on the Excl. VAT button |
| Incl. VAT button text | Text displayed on the Incl. VAT button |
| Toggle background color | Background color for the tax toggle |
| Active toggle element color | Color for the active toggle element |
| Toggle text color | Color of the text in the tax toggle |
Label Settings
| Setting | Description |
|---|---|
| Tax Included Label | Text shown next to prices with tax (e.g., ‘incl. VAT’) |
| Tax Excluded Label | Text shown next to prices without tax (e.g., ‘excl. VAT’) |
| Zero Tax Label | Text displayed for tax-exempt products, or when no tax rate is configured |
| Show Tax Suffixes in Cart | Enable/disable tax suffixes in cart prices and subtotal |
Variable Product Settings
| Setting | Description |
|---|---|
| Variable Price Prefix | Prefix for variable product prices (e.g., ‘From:’) |
Popup Settings
| Setting | Description |
|---|---|
| Enable Popup | Toggle popup functionality |
| Popup background color | Background color selection |
| With tax button color | Color for the with-tax button |
| With tax button text color | Text color for with-tax button |
| Without tax button color | Color for without-tax button |
| Without tax button text color | Text color for without-tax button |
| Popup Header | Header text for the popup |
| Popup Description | Explanatory text for the tax selection |
| Business Button Text | Text for business customer button |
| Private Button Text | Text for private customer button |
Installation Guide
- Download the Plugin
- Download the .ZIP file of “Clypper’s Tax Toggle for WooCommerce”
- Upload and Activate
- Log in to WordPress admin dashboard
- Navigate to Plugins -> Add New -> Upload Plugin
- Choose the downloaded .ZIP file
- Click Install Now
- Activate the plugin
- Enable Tax Calculations
- Go to WooCommerce -> Settings -> General
- Enable “Enable tax rates and calculations”
- Set Default Tax Rate
- Access WooCommerce -> Settings -> Tax -> Standard Rates
- Configure tax rates according to your requirements
- Configure Plugin Settings
- Visit the plugin settings page
- Customize colors, texts, and features to match your store’s design